


Microsoft Office 365 has proven to be one of the best existing platforms in the market for collaboration and communications. It helps organizations to make their work environment more comfortable and convenient. Because of this, every business moves to Office 365. If many companies use cloud platforms, they need to import PST into Office 365 Mailbox. Here are the reasons:
- To protect the PST file from data loss or corruption
- To save the PST file content
- Methods for importing PST files into Office 365
In general, there are two manual ways to migrate pst to office 365: Network Upload and Drive Shipping.
Network Upload – Use this method to upload PST files as directed by Microsoft and then migrate them to the Office 365 import service.
Drive Shipment – This method copies the .pst files to a temporary hard disk and then sends them to Microsoft Center. After the drive is shipped, the Office 365 Import Service must import data into Office 365.
Method 1 – Network Upload to Migrate PST to Office 365, Manually
Network upload is one of the most complicated ways to import PST file into Office 365 mailbox because it uses the Azure Azcopy tool and the SAS URL. This method includes the following steps.
- Install the Azure AzCopy Tool with the SAS URL
Visit https://protection.office.com and sign in with the Office 365 administrator account. Now select Import from the Office 365 menu. In the open wizard, select whether you want to upload the data to the network or send it directly. - Upload the PST file
Run the Azure AzCopy tool to upload the file and make sure that the PST file has been saved to the file server in the organization. Note: Use MS Azure Storage Explorer to preview the PST file after uploading. - Create the PST Import
Mapping File After uploading the PST file, create a CSV file to specify the mailboxes where the PST files should be imported. - Creating a job to import .pst files
In Office 365, you must create an import job that selects data from the .csv file to migrate PST to Office 365.
After the job is created, Office 365 begins analyzing the data, and you can set specific filters on the data before you send it to Office 365. After you have set the filters, you can start the import job.
Once the job has been created, Office 365 will begin to analyze the data and you can apply certain filters to the data before you move it to Office 365.
Method 2 – Drive Sending to Import PST File Into Office 365 Mailboxes, Manually
We can not say that the drive-sending method is similar to that of the network upload method because this method makes the process of importing PST slightly different in Office 365. This method requires you to use a hard disk. This method includes the following steps.
- Using the PST Import
Tool Install the WAImportExport.exe tool on your system and copy a secure storage key to import PST files to disk. - Copy the .pst file to the hard disk
Use the Import tool to copy the .pst file to the hard disk and create a journal file to store information for this operation. - Create a PST import job in Office 365
Import the .pst files from the hard disk to the Azure storage area after the .pst file has been copied to the hard disk. Also, use a CSV file to select the information that indicates which mailboxes the PST file must be imported to. - Sending the hard disk to the MS Cloud
The last step in the hard disk shipping method is sending the Bit-Locker encrypted hard disk to MS Cloud. After the hard disk is retrieved from Microsoft, the PST file is uploaded to the Azure storage area. The final step in the disk shipping method is to ship the Bit-Locker encrypted disk to MS Cloud.
As you can see, both of the above manual methods are very complicated and confusing. It also requires technical expertise and extensive knowledge of using Office 365. And if something goes wrong, you have to start from scratch and therefore, using these two methods is not the ideal choice for non-technical users. What options do you have for migrating PST file data to Office 365?
Use Automated Tool to Import PST File into Office 365 Mailbox
The Best automated tool available in market to migrate PST to Office 365 is by using the SysTools Outlook to Office 365 migration tool. Using this tool you import multiple PST files to multiple users at a time. You can login via Admin & User credentials both. Using Admin Account you can also import PST file into Office 365 shared mailbox. The tool is so simple that non-technical user can also import their PST file to Office 365 without any hassle. Following are the steps to Import Outlook PST to Office 365:
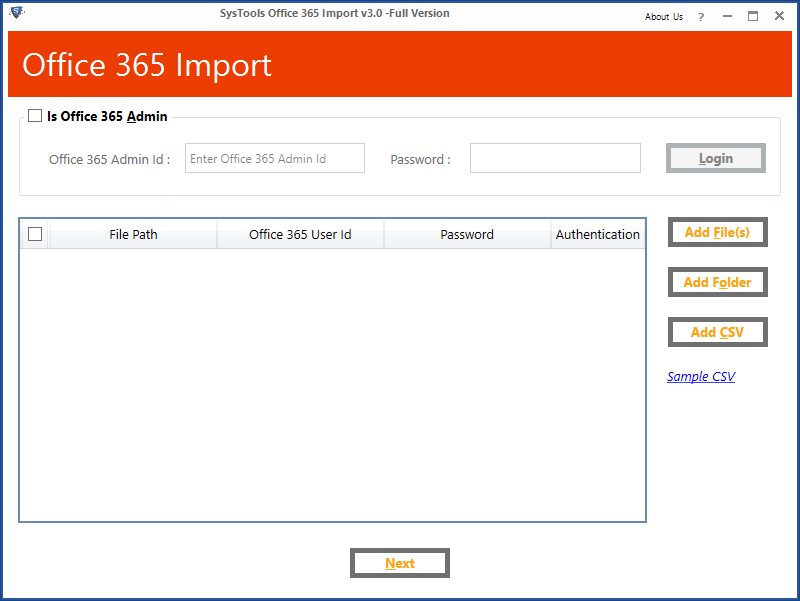
1. Download and Install tool to migrate PST to Office 365
2. Enter the Admin or User Credential for login
3. Add the PST file into the software using Add File/ Folder Option
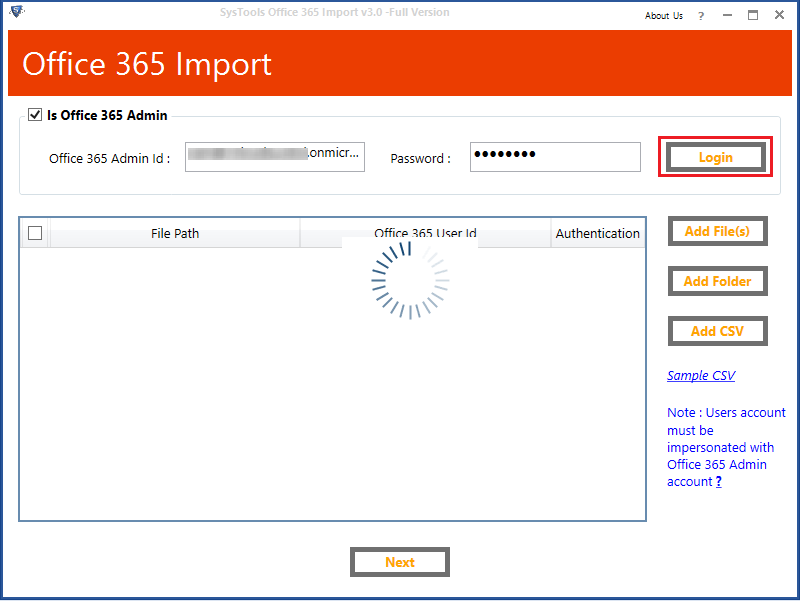
4. Create a CSV file or enter user account credentials for mapping of PST file

5. Select the category data you from PST file that you wish to migrate

6. Set the Date Filter & check Incemental option to Import new email (upon remigration)
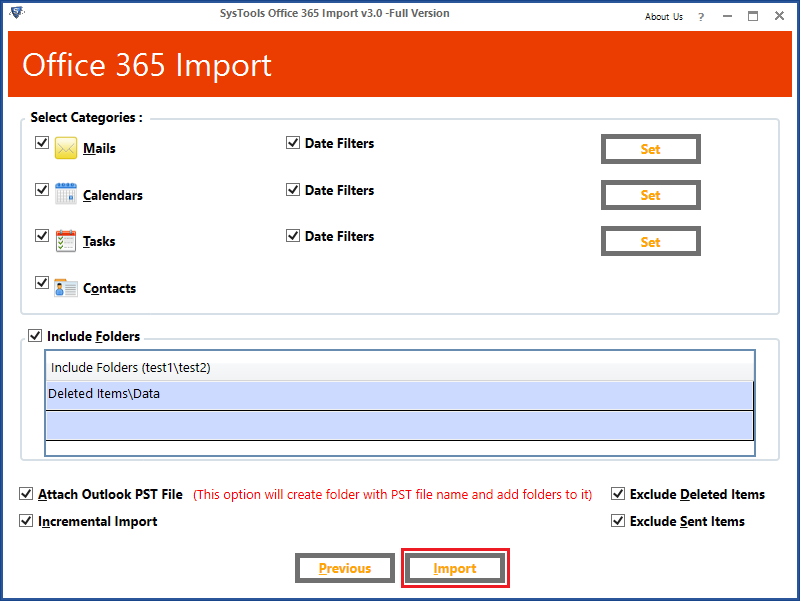
7. Click on Import button to transfer all data from PST file to Office 365 account.
Conclusion
For many Office 365 user its very important for them to Import their orphan PST file from other account or Outlook. However, due to the complicated procedures like Drive shipping and network upload the task become complex. So, make the process easy we have explained how to Import PST file into Office 365 mailbox without any problem and error. The Office 365 Import Tool can migrate all your data from PST file to Office 365 mailbox in few steps. Try the tool now, and make the import prcoess easy.
